Exporting Data from Lone Wolf
Extract Transactions, Agents, and Profiles from Lone Wolf (Back Office) for the purposes of importing into the Iluminai platform.
Content
Downloading the Lone Wolf Custom report
We have provided a pre-built Lone Wolf (Back Office) custom report containing all the information necessary for performing continuous monitoring through the Iluminai platform.
Click here to download the Iluminai Lone Wolf custom report definition file (.rpt)
When prompted, save this file to your Desktop or wherever your Lone Wolf system has appropriate access to.
Note: The downloadable report definition file (.rpt) above can only be opened by Lone Wolf. Attempting to open this directly from Windows Explorer will have no effect and you may receive a message that this file type is not associated with any application which can open it.
Adding the custom report to Lone Wolf
The following steps will guide you through importing the pre-built custom report to your Lone Wolf system.
- Within Lone Wolf in the right hand menu, navigate to Reporting → Custom Reports → Create Reports
- Click on the Trade Reports label to highlight that report category
-
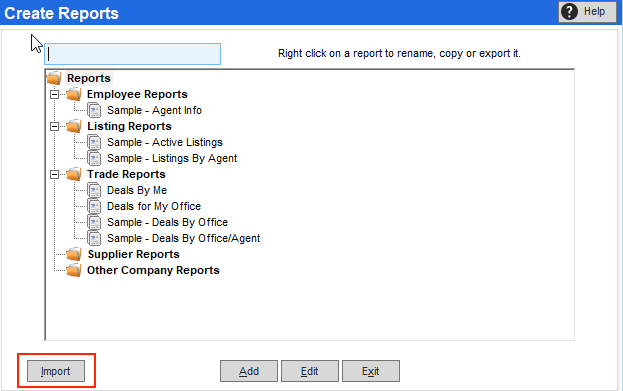
Click the Import button in the bottom left side of the dialogue which appears as shown in the image below
- In the dialogue which appears after clicking the Import button, using Windows Explorer, navigate to the location where you had downloaded and saved the custom report in the previous section (this may be on your Desktop or alternatively a shared drive if using a cloud-like install of Lone Wolf)
-
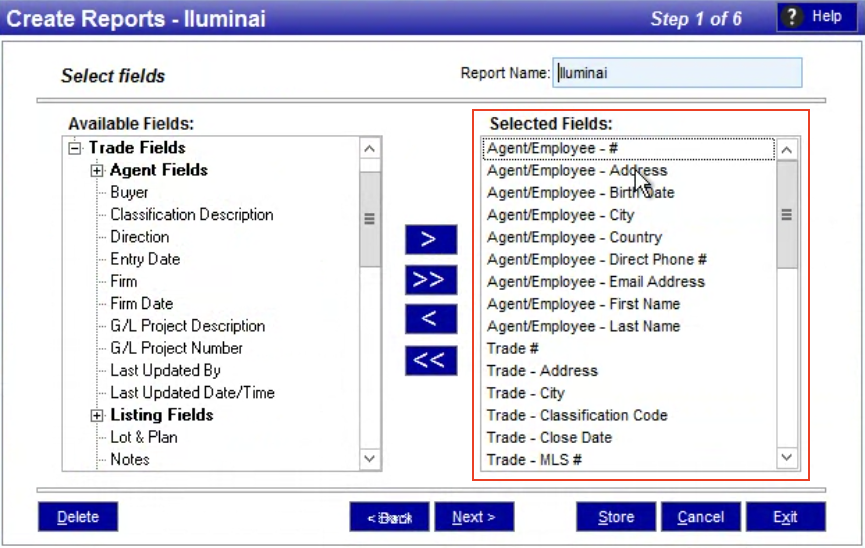
Verify that after selecting the custom report from the Windows Explorer, that the dialogue reflects the same choices in the Selected Fields section
- Click the Store button to save the changes and return back to the main Lone Wolf screen
Running the report / exporting data
Now that the custom report has been imported and made available to Lone Wolf it's time to run it.
-
In the main Lone Wolf menu, navigate to Reporting → Custom Reports → Run Reports
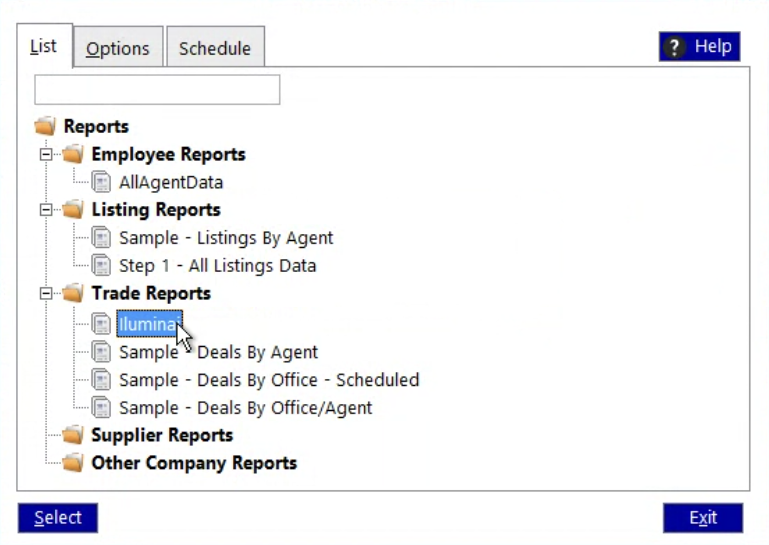
Within the screen which appears, select the report titled Iluminai from the Trade Reports category, as show in the image below
Click the Select button in the bottom left of the dialogue
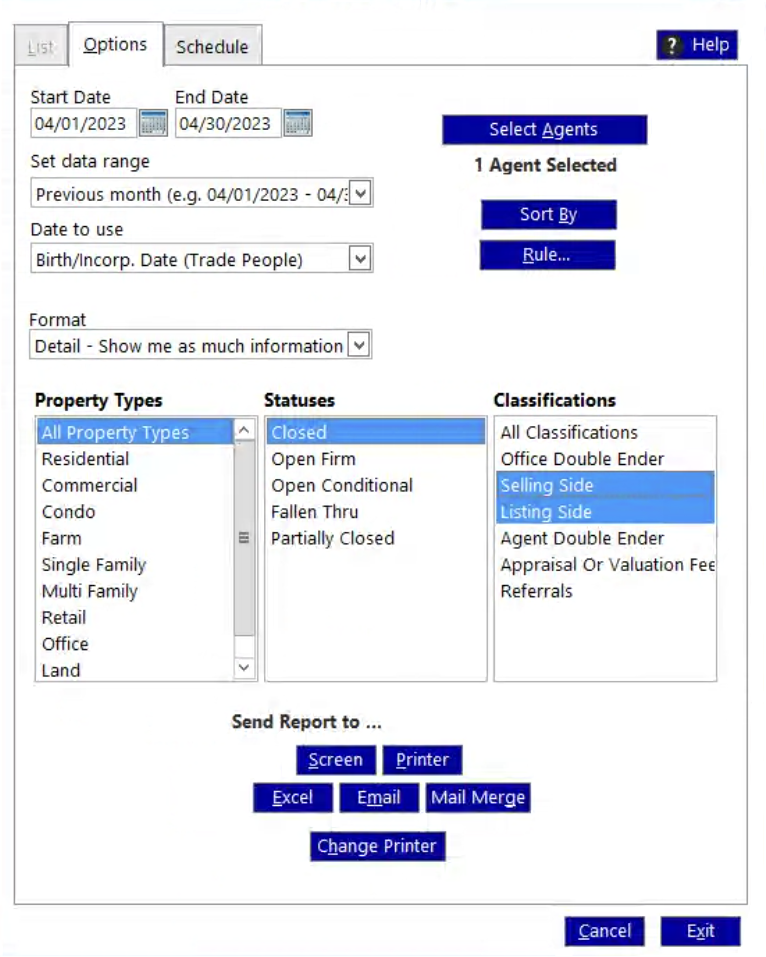
In the Options tab shown below, work through the following filtering selections
- Specify date range for the Transactions, Agents, and Profiles you wish to export by using the Start Date and End Date fields
- Specify the Date to Use to be "Closed Date"
- Specify Statuses to only include "Closed"
- For Agents, we recommend including Terminated employees as they would have been associated with Transactions in the past which should be included in the final export
- For Classifications, we usually recommend including "Seller Side" and "Listing Side", however you may want to include "Double Enders" to cover past Canadian regulations and any other applicable classifications for which you would want to apply continuous monitoring to
- When satisfied with the options above, in the Send Report to ... area of the dialogue click the Excel button
-
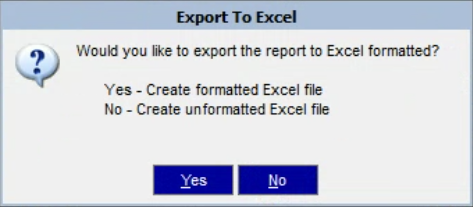
On the confirmation dialogue which appears, click the No button for "Create unformatted Excel file" (this simply strips any company header and formatting information from the final XLS file
- When prompted, select a location on your local computer or network to save the produced file
- The file name will default to "Iluminai.xls"
- At this point the export should begin
- Depending on the amount of data, the speed, and configuration of your computer and/or network this could take a few minutes to complete
- On some systems, an alter may appear regarding not having enough permissions to perform the action, in most cases this can be dismissed and the report generation will unhindered
