Form Notifications
This section allows administrators to configure email notifications for form-related activities.
Content
Overview
The Notifications section in Account Configuration allows for administrators to set up and customize email notifications for various form-related activities. Administrators can define recipients for notifications when forms are submitted, including high-risk forms, and when forms are approved. They can also customize the content of these notifications, such as tailoring messages for different user roles like Agent, Team Admins, or Clients. Custom email content options include HTML and text formats, with dynamic tags to personalize notifications. This feature provides flexibility in keeping relevant stakeholders informed based on the status of form submissions and approvals.
Customizing notification recipients
- In the Account Configuration screen, navigate to the Notifications section

- Under the Notifications section, specify recipients for form-related activities:
- Submitted Forms
- High-Risk Forms
- Approved Forms
- Reply-To on Notifications
Note: Separate multiple email addresses with commas

Customizing email content
Custom Tags
There are a few Custom Tags which you can incorporate in your custom email content.
| Notification | Custom Tags |
|---|---|
| User Welcome - Agent/Team Admin |
|
| IDV - Person Not Present - Initiated |
|
| IDV - Person Not Present - Completed |
|
To use a custom tag in your HTML content block, you can simply include them like this:
<p>Hello, {{ client_first_name }}</p>
If you are including any of the custom tag URLs, using an HTML <a> tag will make the text a hyperlink so the recipient can navigate to the URL by clicking the text:
<a href={{ one_time_link_url }}>Click Me!</p>
Making changes to your email content
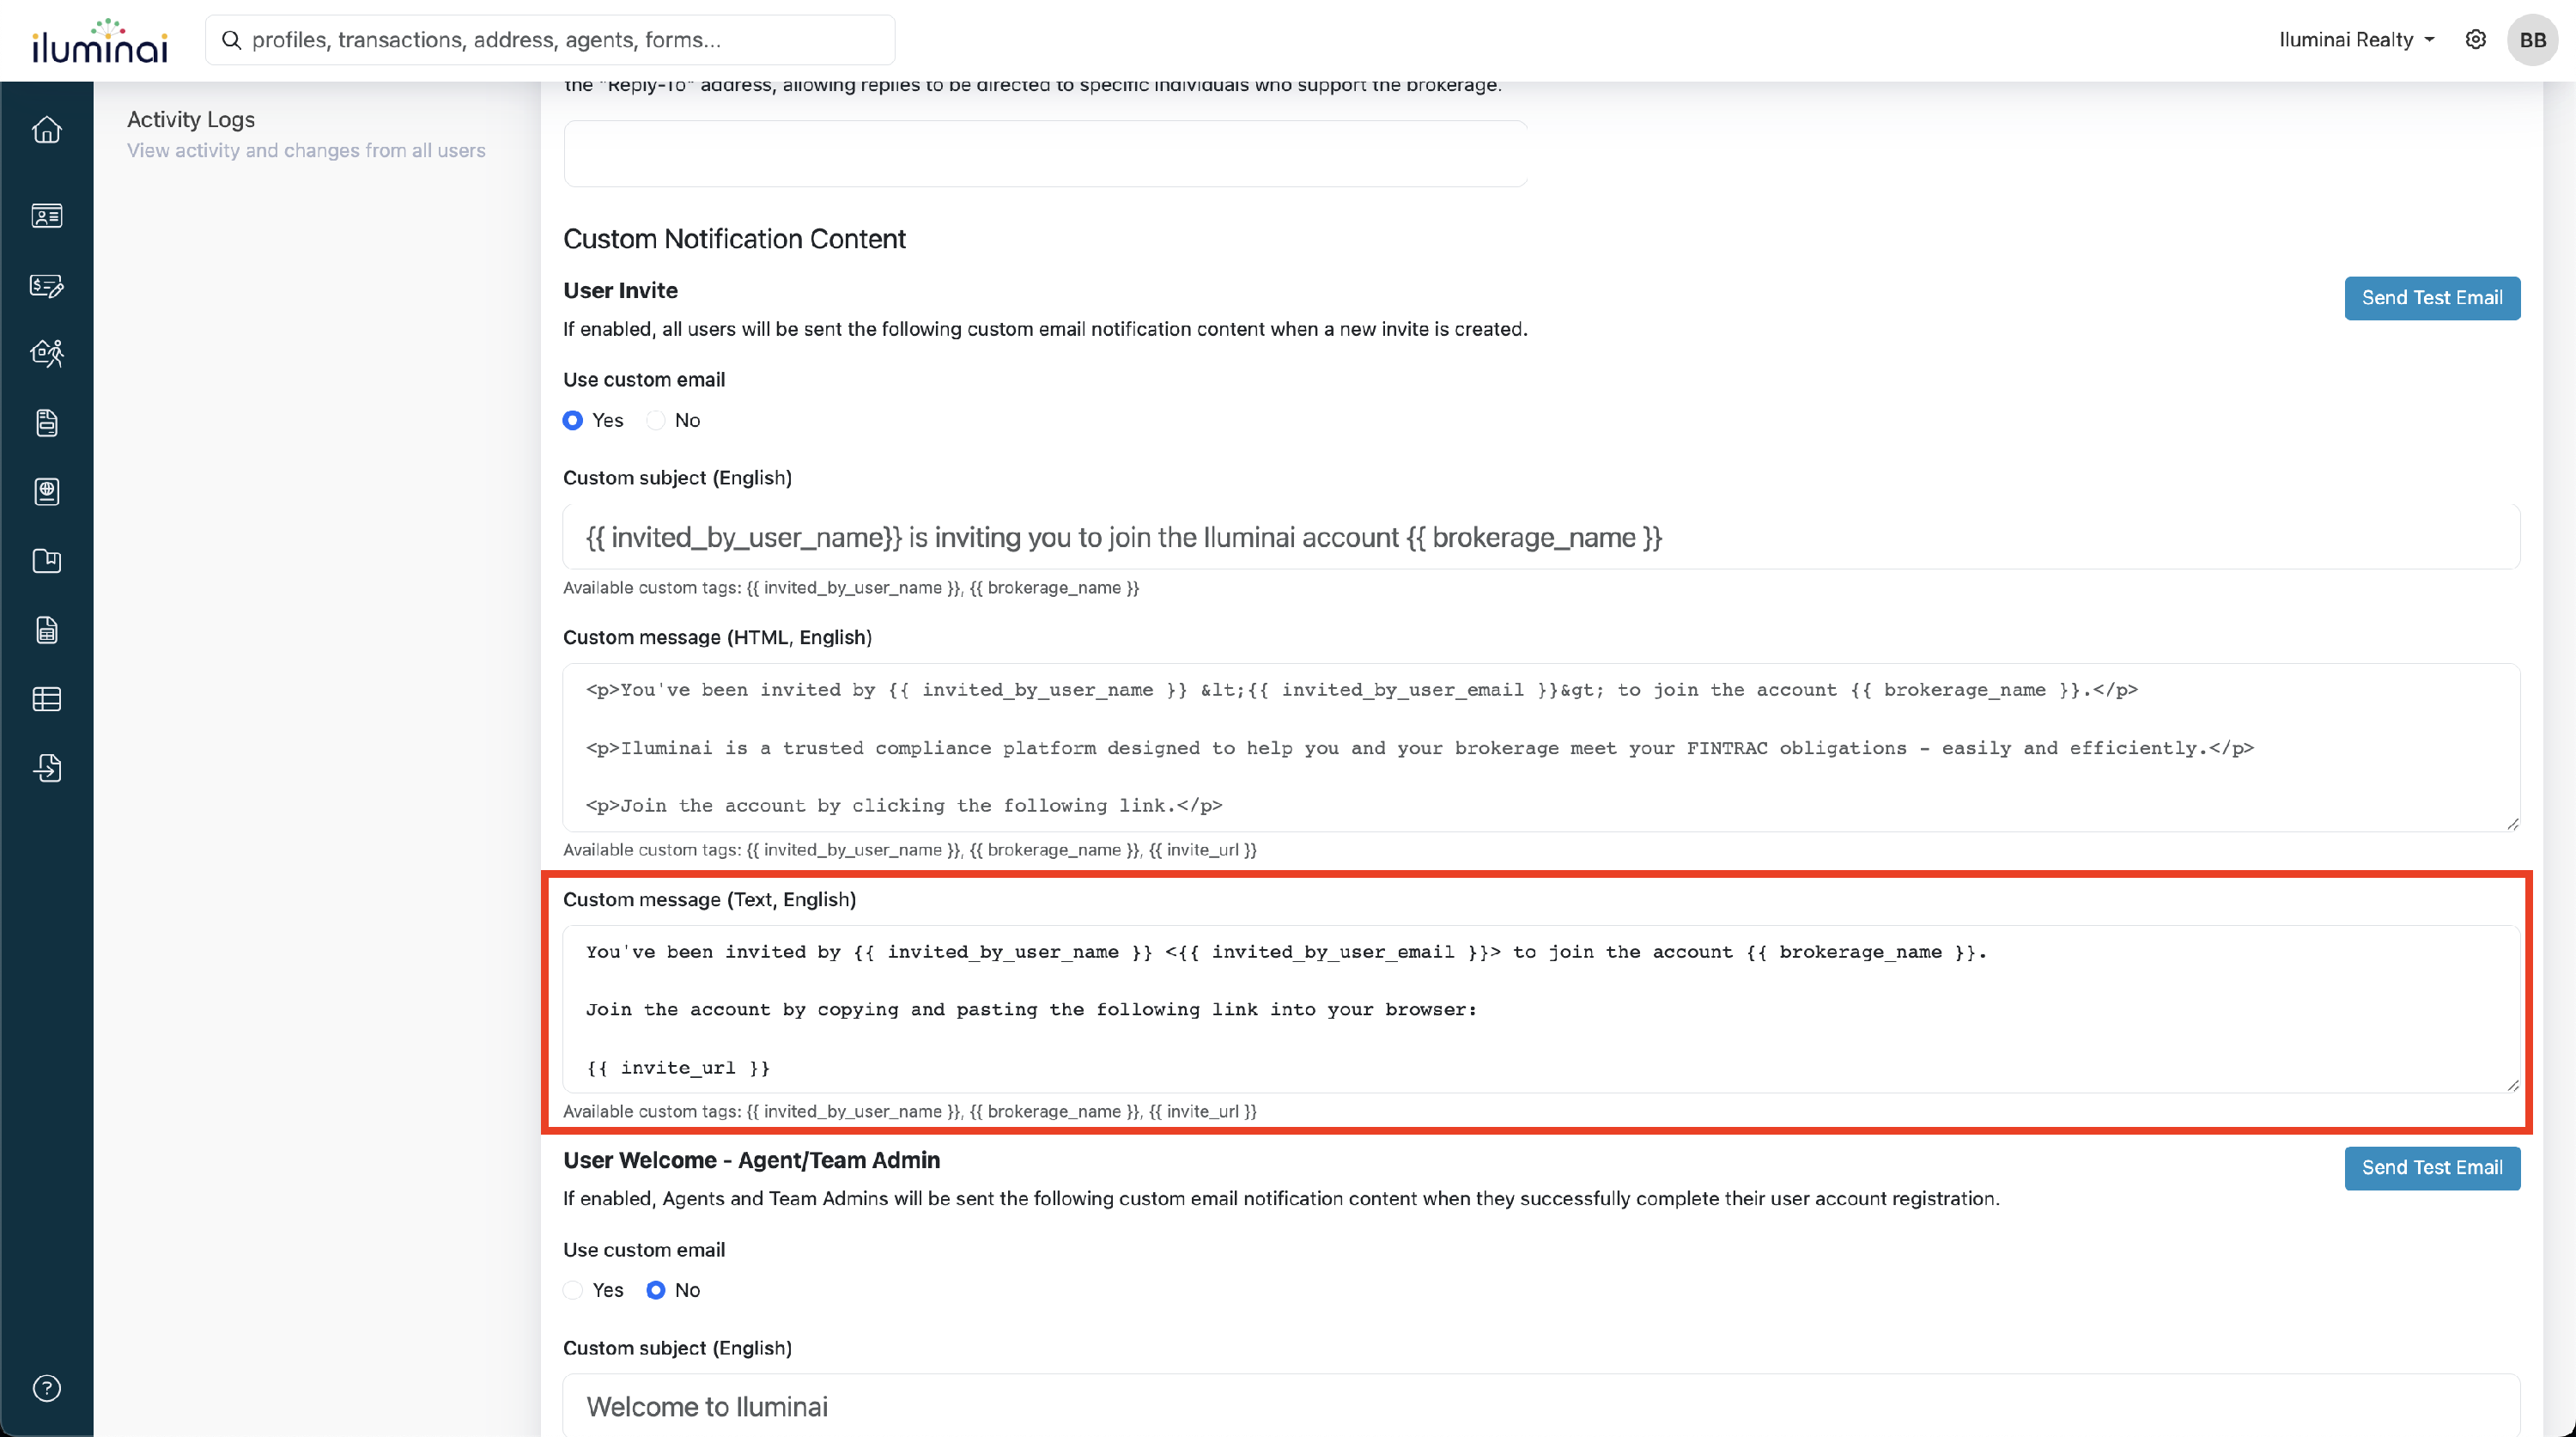
- Under the Custom Content section, choose the type of Notification you wish to customize:
- User Invite
- User Welcome - Agent/Team Admin
- IDV - Person Not Present - Initiated
- IDV - Person Not Present - Completed
- Privacy Notice and Consent Record Approvals (if applicable)
- FINTRAC Identification Record Approvals
- Receipt of Funds Approvals
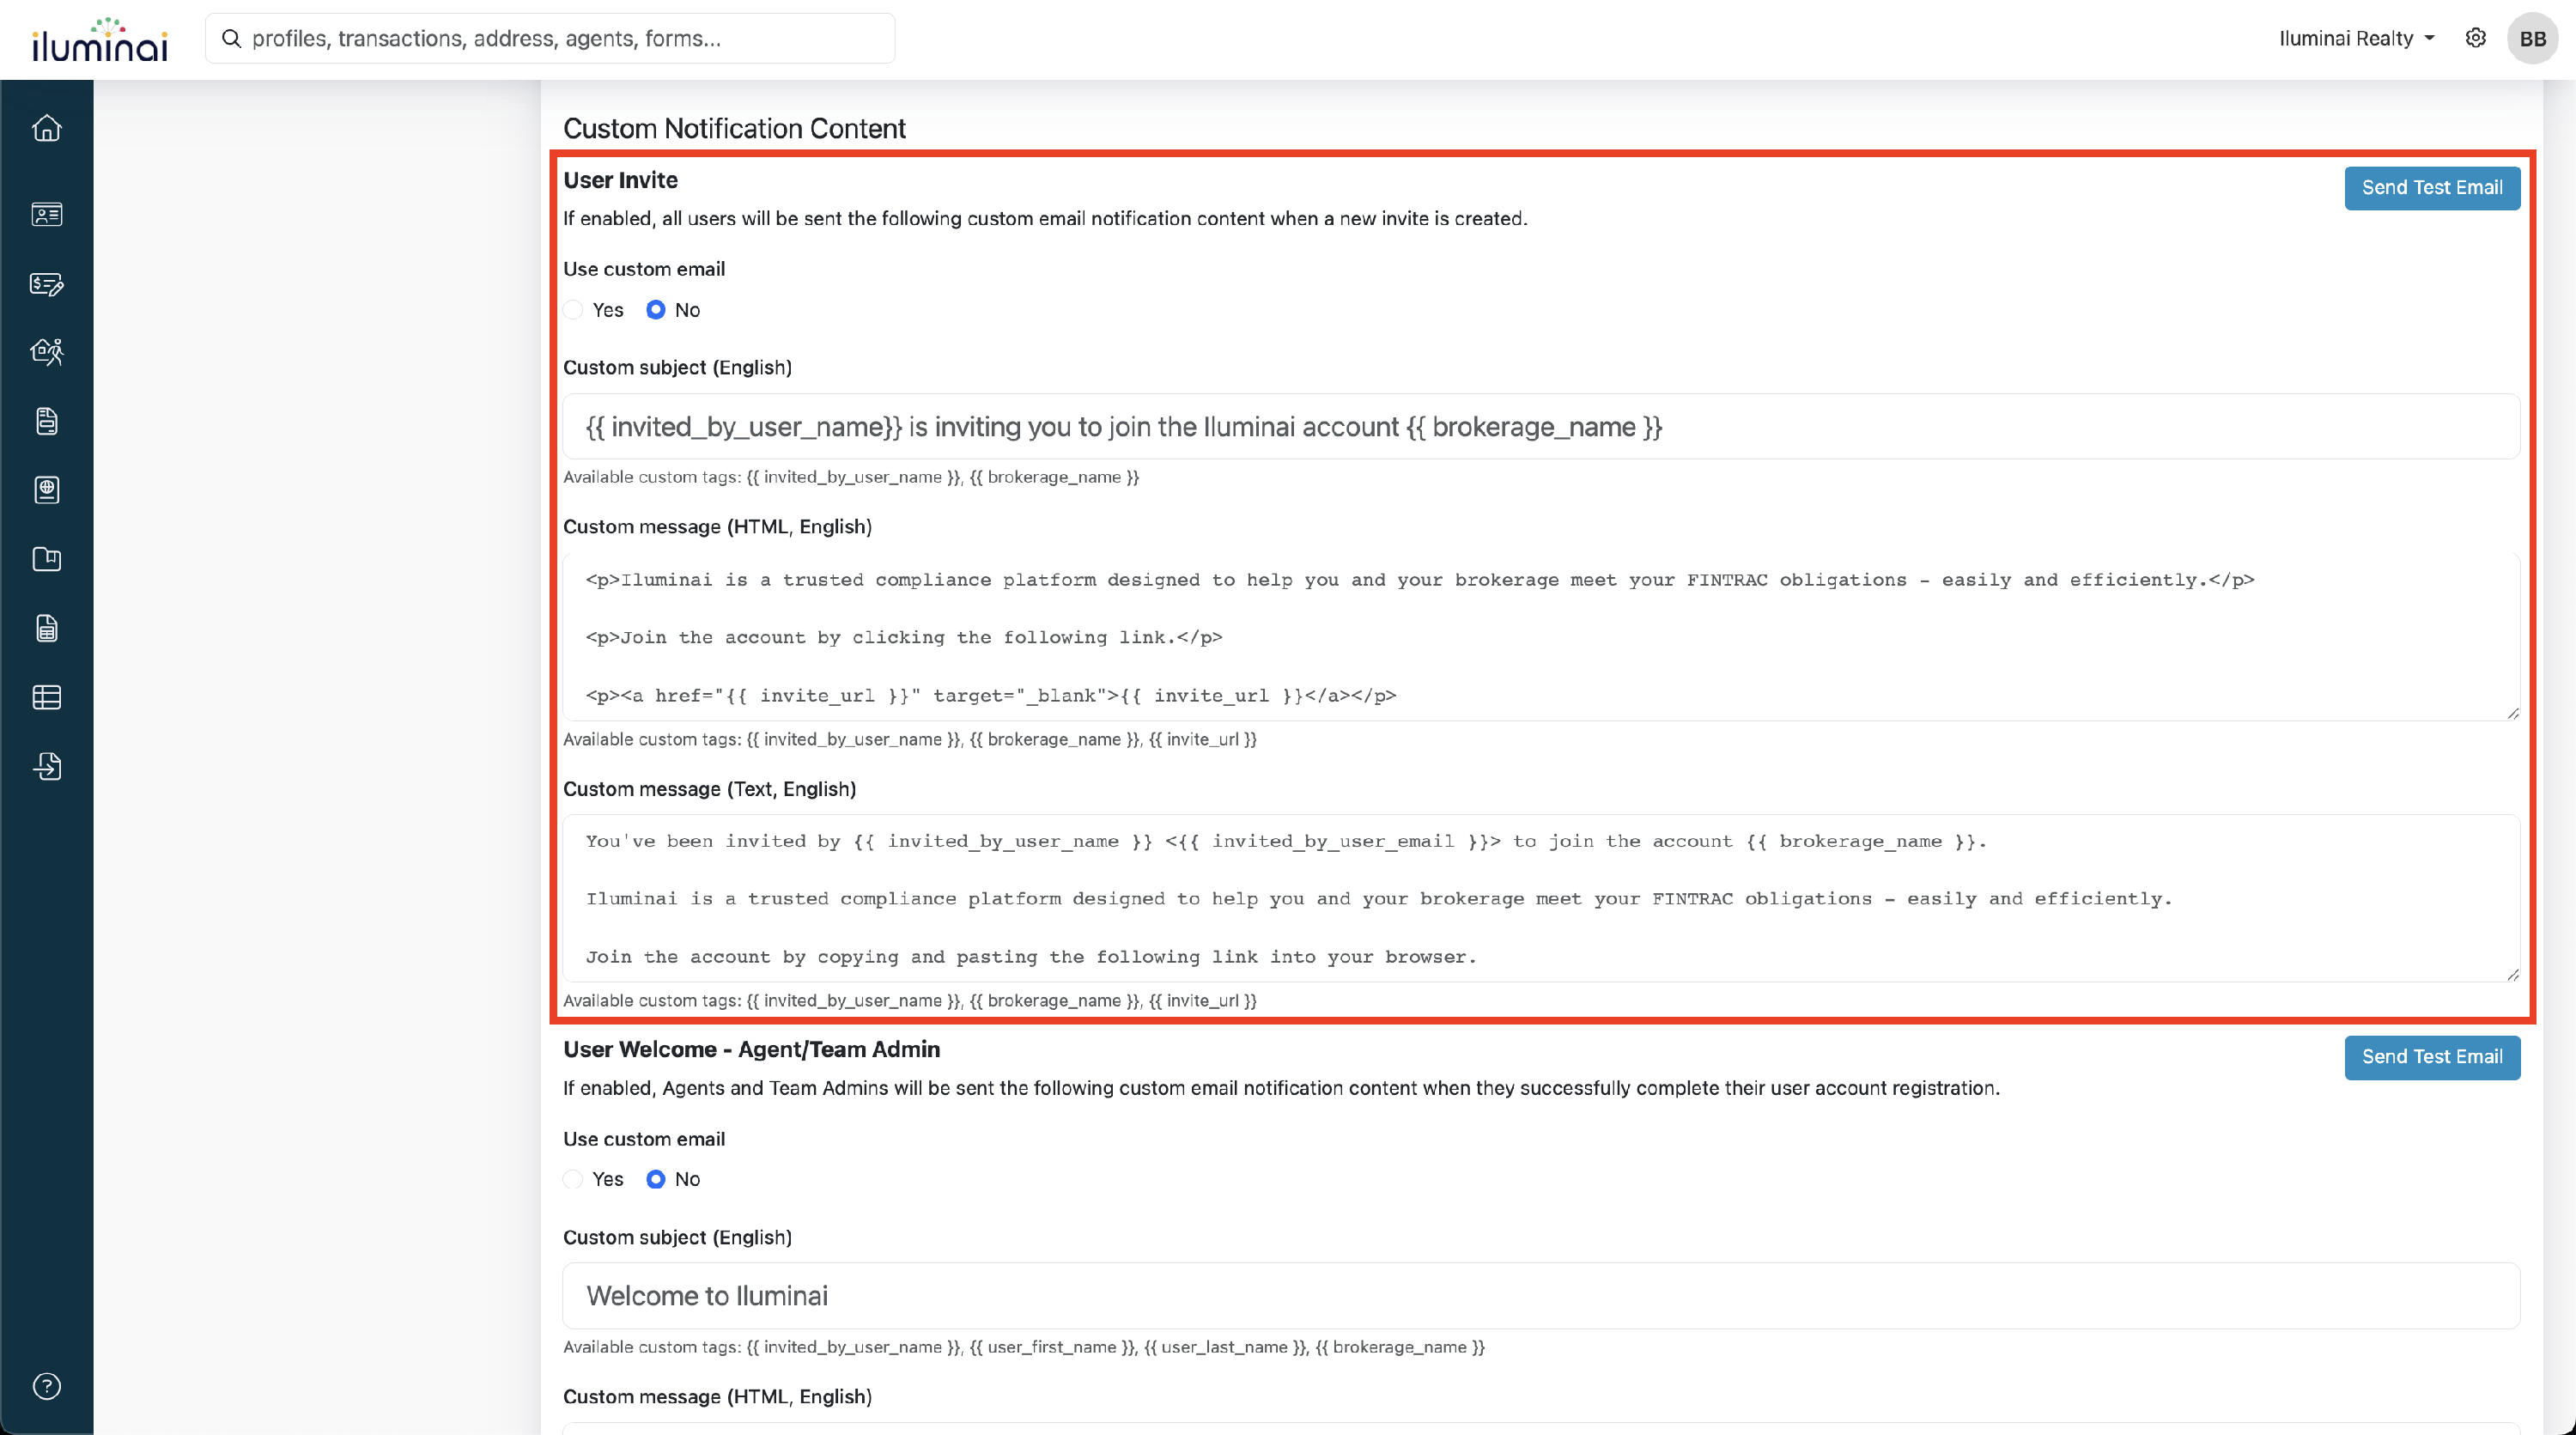
- Toggle the option to Yes under Use custom email to use the custom content create

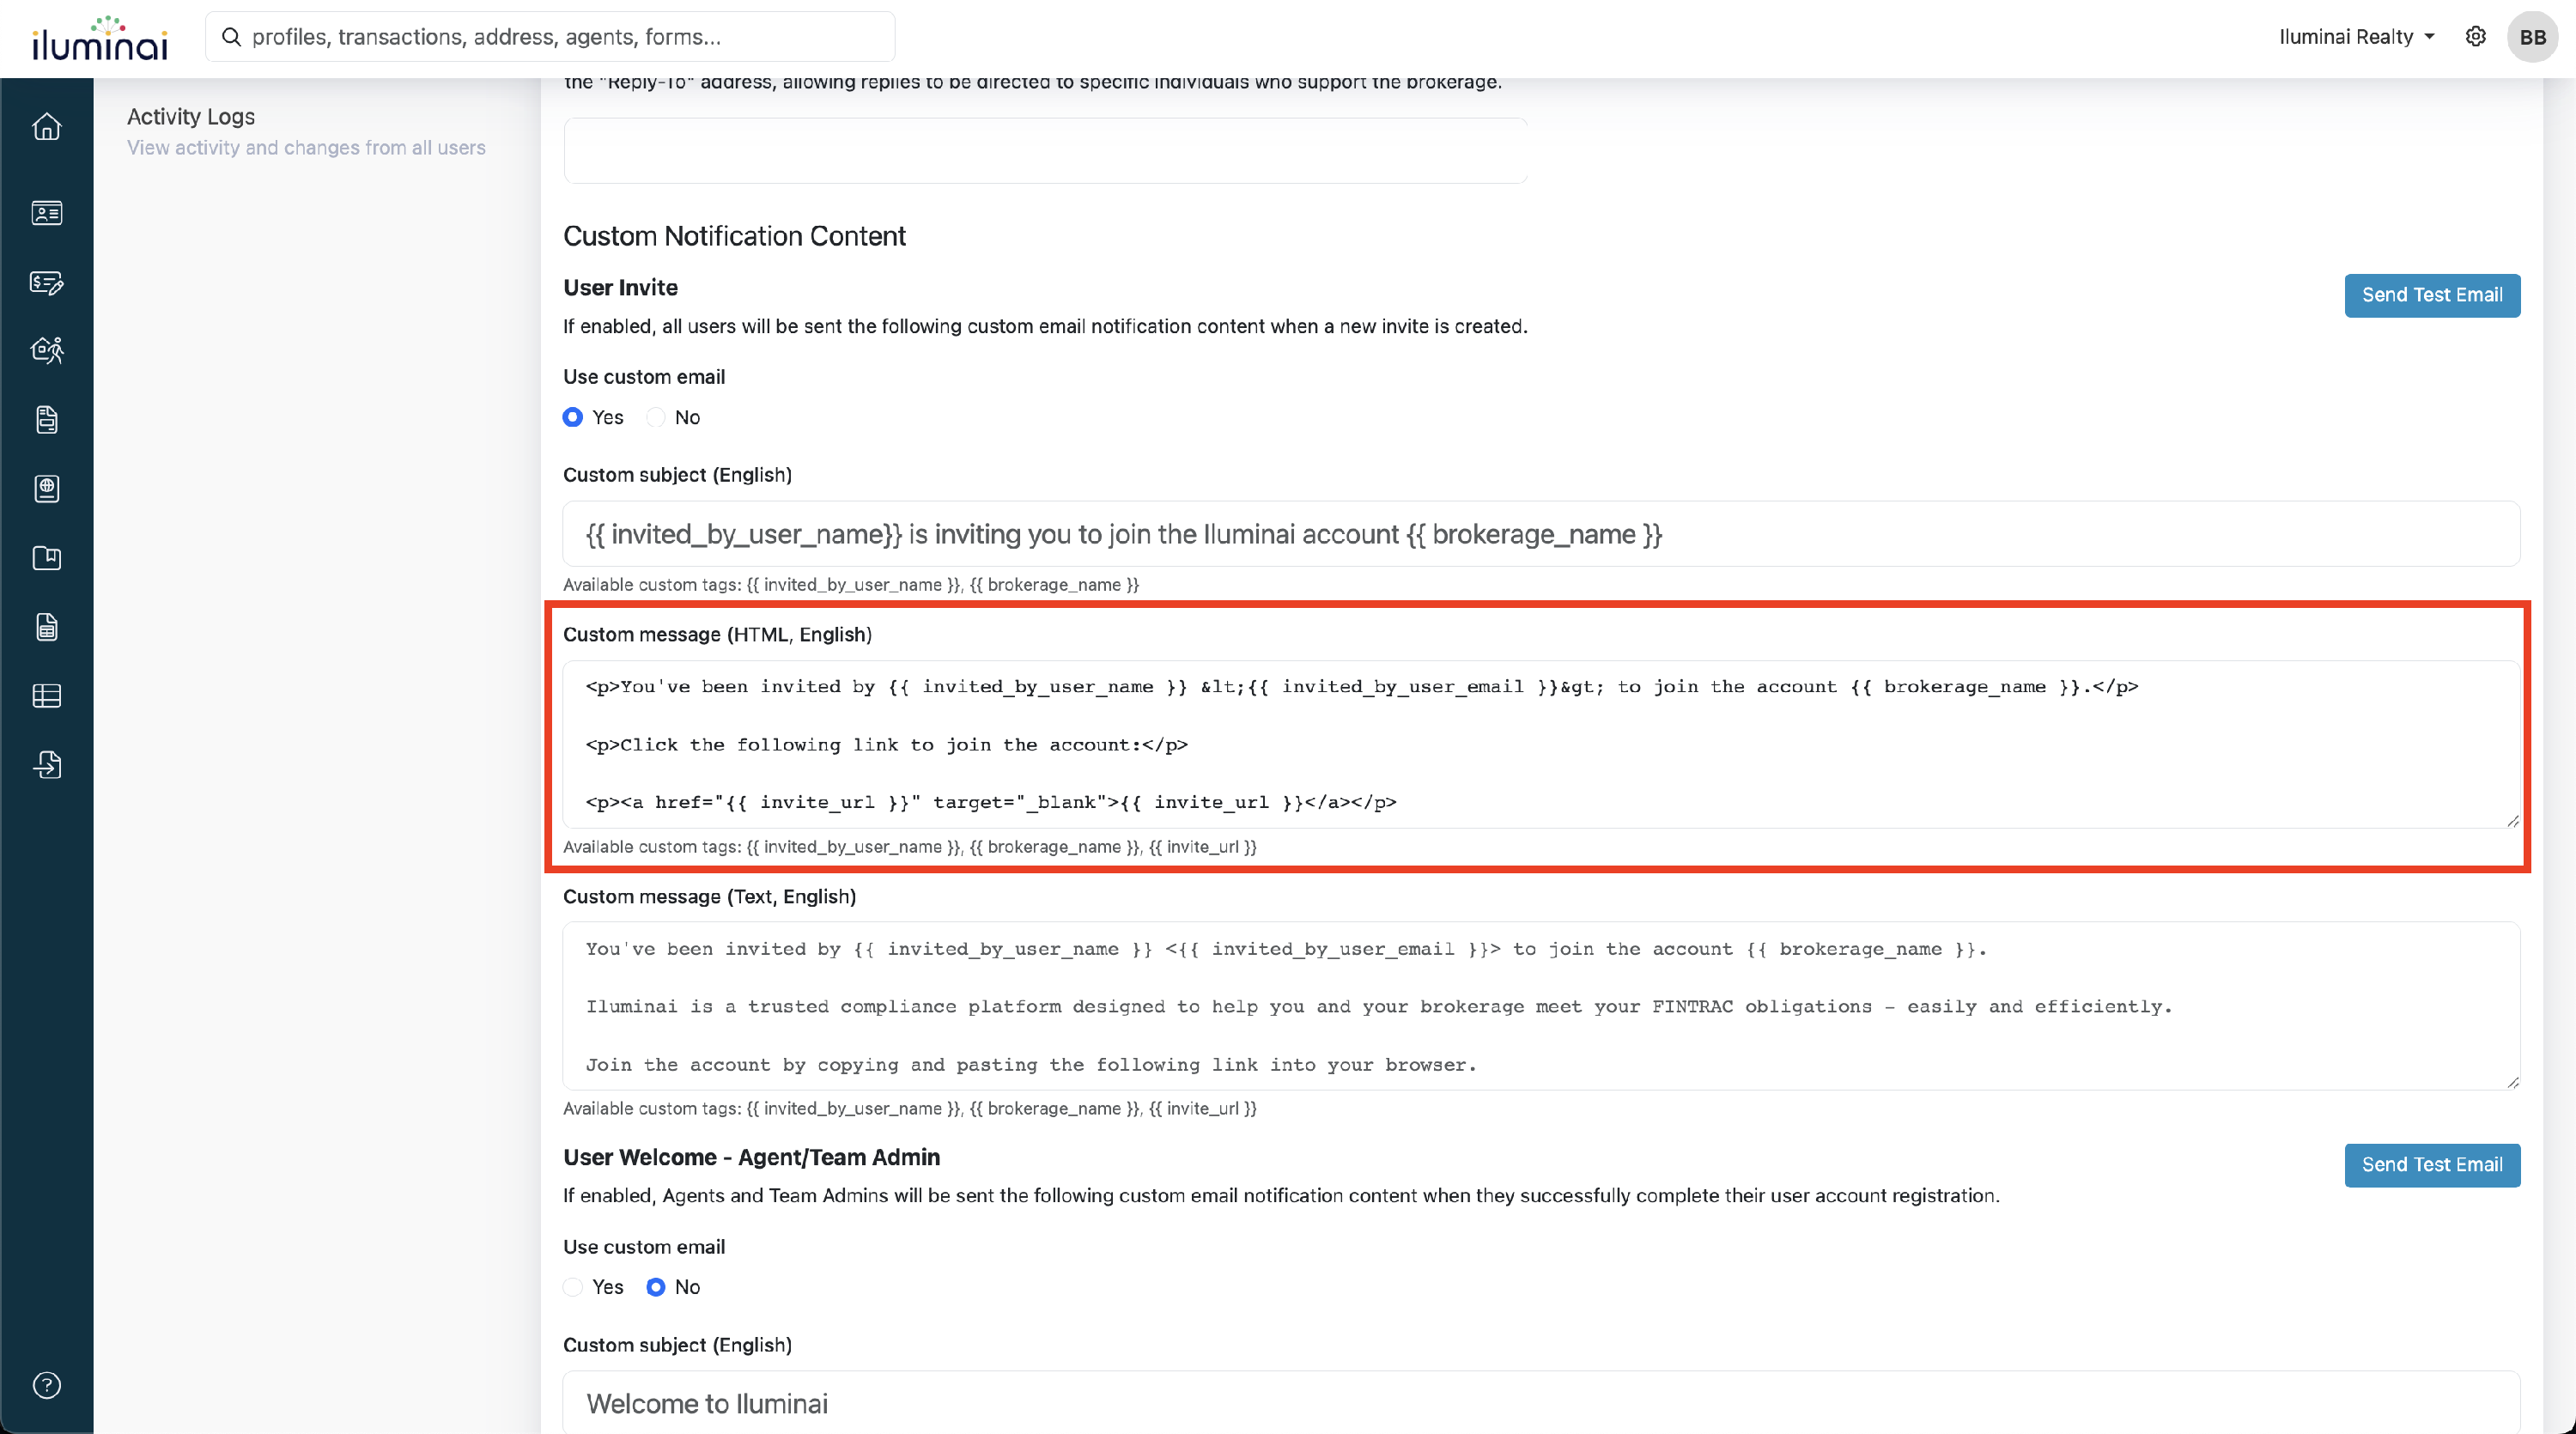
- In the Custom message (HTML) field, add your HTML content
Example HTML content:
<p>You've been invited by {{ invited_by_user_name }} <{{ invited_by_user_email }}> to join the account {{ brokerage_name }}.</p>
<p>Click the following link to join the account:</p>
<p><a href="{{ invite_url }}" target="_blank">{{ invite_url }}</a></p>
- If you prefer plain text, use the Custom message (Text) field to write the message without HTML formatting